
Christmas' time..Christmas tree..animated >:)
Create the document. 1000px X 1000px.
Fill it in with a dark red gradient..or purple?:) Your choice.
Just pick a nice color that will look good with a green tree on it.
The point is how to animate things.
So the tree is not going to be FANTASTIC.Just a rough sketch.
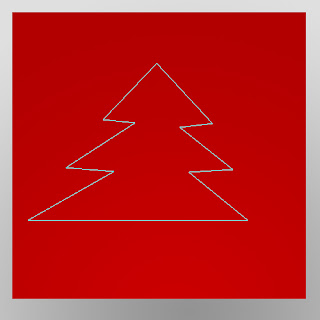
Good. Create a new layer, pick up the Pen Tool (P) and draw a shape that looks like this:
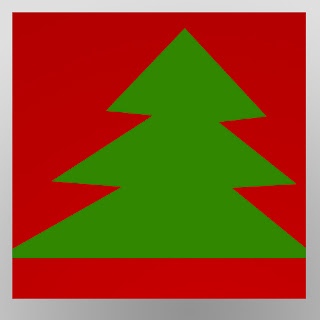
Choose a nice green for you foreground color.
Right click on your canvas and select Fill Path. Make sure you have "Foreground Color" selected and hit Ok.
Let's add the lights now, in a different layer.
With a small soft rounded brush, draw a few spots as shown:

Now duplicate the layer.
As you can see the lights look like they are stronger with both layers visible:

Now comes the funny part. Animating them.
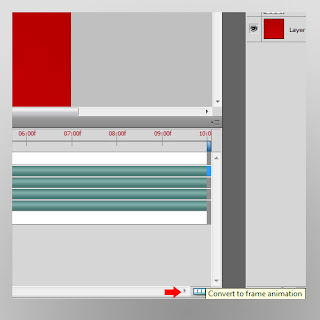
Go to Window->Animation.
A different panel should pop up in the bottom of your screen.

In the right lower corner find the button shown in the screenshot and press "Convert to frame animation".
Press "Duplicate selected frames"

A different instance of the layers will appear.
At this step you need to hide the last layer created.
Select 0.1sec as frame delay time, by pressing the small arrow indicated by my red arrow in the screenshot,
and choose "Forever" instead of once where the blue arrow indicates.

Press play to test your animation:)
Congratulations. You've just created your first Photoshop .gif file.
In order to use it, you must save it properly.
So goto File->Save for Web&Devices, hit Ok, name your file and hit again Ok.
I'm using Gif Viewer 3 so I can see my .gif file properly.
Done:)

If you’ve enjoyed this tutorial don’t forget to subscribe, like us on Facebook , follows us on Twitteror distribute it using the sided button...it’s just that this is a simple thing to do and it will keep this blog running.
Thanks for reading my blog.
Ela. xx
Create the document. 1000px X 1000px.
Fill it in with a dark red gradient..or purple?:) Your choice.
Just pick a nice color that will look good with a green tree on it.
The point is how to animate things.
So the tree is not going to be FANTASTIC.Just a rough sketch.
Good. Create a new layer, pick up the Pen Tool (P) and draw a shape that looks like this:

Right click on your canvas and select Fill Path. Make sure you have "Foreground Color" selected and hit Ok.

Let's add the lights now, in a different layer.
With a small soft rounded brush, draw a few spots as shown:

Now duplicate the layer.
As you can see the lights look like they are stronger with both layers visible:

Now comes the funny part. Animating them.
Go to Window->Animation.
A different panel should pop up in the bottom of your screen.

In the right lower corner find the button shown in the screenshot and press "Convert to frame animation".

Press "Duplicate selected frames"

A different instance of the layers will appear.
At this step you need to hide the last layer created.
Select 0.1sec as frame delay time, by pressing the small arrow indicated by my red arrow in the screenshot,
and choose "Forever" instead of once where the blue arrow indicates.

Press play to test your animation:)
Congratulations. You've just created your first Photoshop .gif file.
In order to use it, you must save it properly.
So goto File->Save for Web&Devices, hit Ok, name your file and hit again Ok.
I'm using Gif Viewer 3 so I can see my .gif file properly.
Done:)

If you’ve enjoyed this tutorial don’t forget to subscribe, like us on Facebook , follows us on Twitteror distribute it using the sided button...it’s just that this is a simple thing to do and it will keep this blog running.
Thanks for reading my blog.
Ela. xx
No comments:
Post a Comment