First things first. Open Photoshop and create a new 500px x 500px document.
Grab the gradient Tool (keyboard shortcut for Windows is G).
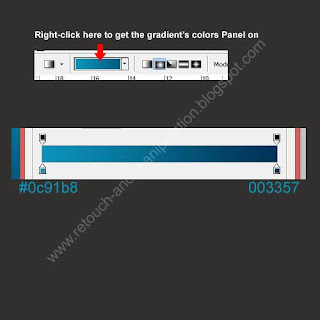
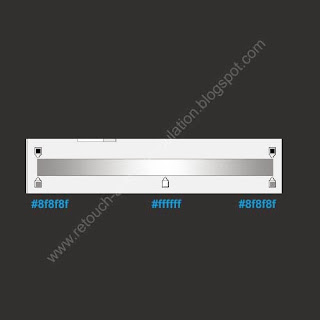
Right click in the upper left corner right on the gradient to open the color palette, and set the colors used in the printshot below.
For the next step, in a new layer, with the Rounded Rectangle Shape, draw a white rounded rectangle right in the middle of your canvas.
Radius: 20px.
Let's make a bit glowy. Open the Blending Options Panel by double-clicking on the layer's thumbnail.
Add an Outer Glow filter using these settings:
Blending Mode: Light;
Opacity: 100%;
Size: 8px;
Color: #FFF FFF;

For the next step, create another layer. With the same tool, Rounded Rectangle, draw another rectangle just a bit smaller, and place it right in the middle of the other rectangle.
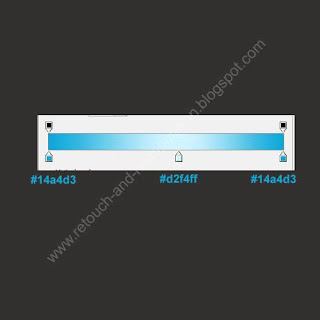
Open the Blending Options Panel again and apply a gradient using the following settings:
Blending Mode: Normal;
Opacity:100%;
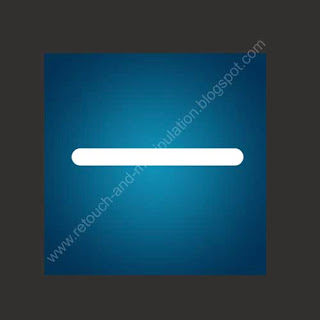
Right now your canvas should look like this :
Moving on.. duplicate the last created layer by right-clicking on the layer's thumbnail and choosing "Duplicate layer".
Change the gradient style for the new created layer just as described below.
Add an "Outer Glow" filter using Screen as Blending Mode, #529fd4 as color , and 29px size.
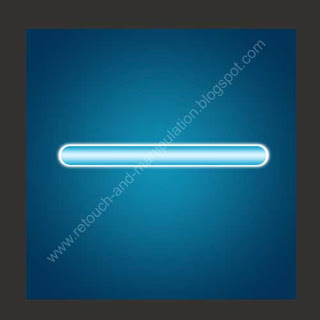
Cut a small part of the rounded rectangle and you should have something like this:
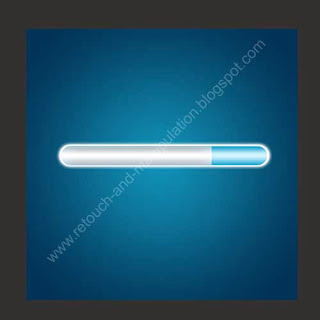
Name it "Loaded part bar" because we will need to refer to this layer later.
Hehe..kinda looks like a pill isn't it?:)
Let's move on.
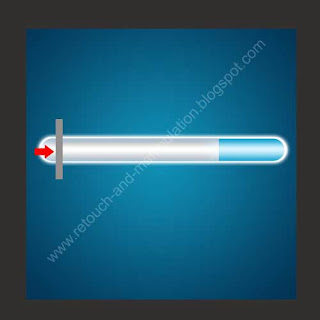
In a different layer, we need to create the stripes. There are several ways of doing them. Pick any color you want. Is not important right now.
With the Rectangle Tool create 1 rectangle as shown. Make it higher than the rest of the loading bar:
Now, with your layer still selected, press CTRL+T on your keyboard to free transform your object. A menu will come up in the upper side of your Photoshop window. Set the angle to 45.
Have a look below if you don't understand. Don't mind the text. My Photoshop is not in English.
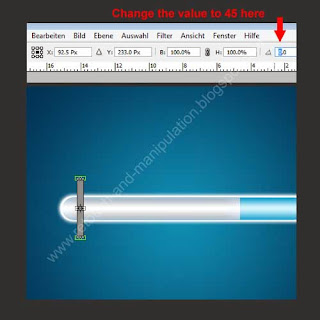
This will rotate your object to 45 degrees.
Now duplicate the layer ten times.
For the next step, select all these 10 layers. If you don't know how, here's a tip you can use even for Windows files. Select first layer, hold down Shift key, and select the last layer of these 10. Press CTRL+E to merge these layers or right-click choose Merge Layers.
Now you have one single layer containing the stripes.
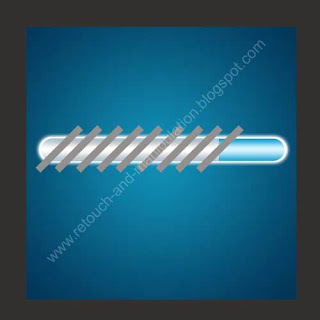
We need to get rid of the extra parts of the stripes. We only need the ones within the borders of our loading bar. We do this by selecting the "Loaded part bar" layer and then inverting the selection. In order to bring up the "Loaded part bar" layer's selection, hold the CTRL key down, and press on the layer's thumbnail. You will notice when you're doing it right because also the cursor changes. I cannot show a printscreen because it doesnt work while CTRL is on. Once your layer's border is visible(selection), press CTRL + I to invert the selection. Go back and select the stripes' layer. It might be a bit confusing but just click on the stripes' layer without holding anything else. We need the "Loaded part bar" layer 's inverted selection to remain on.
So just click on the stripes' layer and hit Delete on your keyboard. All the useless parts should go away:
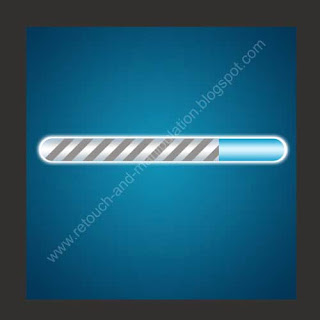
Open the Blending Mode Panel to apply a few styles.
Gradient using the colors below:

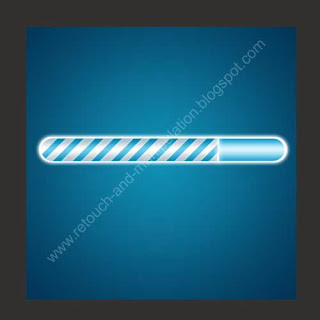
and also add an "Outer Glow" using the following settings:
Screen - > Color: #0088b4 -> Size :5px;
Create another layer. Make a small vertical line right where the stripes end, blur the layer a bit with the Blur Tool(R) and then add an Outer Glow with default settings.
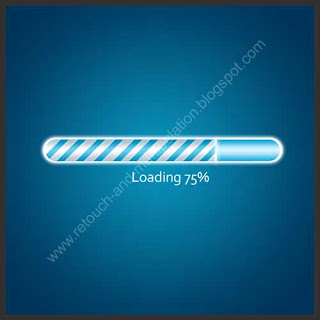
Add a message like "Loading...." , and you are done. Here is the final result:
Grab the gradient Tool (keyboard shortcut for Windows is G).
Right click in the upper left corner right on the gradient to open the color palette, and set the colors used in the printshot below.

For the next step, in a new layer, with the Rounded Rectangle Shape, draw a white rounded rectangle right in the middle of your canvas.
Radius: 20px.

Let's make a bit glowy. Open the Blending Options Panel by double-clicking on the layer's thumbnail.
Add an Outer Glow filter using these settings:
Blending Mode: Light;
Opacity: 100%;
Size: 8px;
Color: #FFF FFF;

For the next step, create another layer. With the same tool, Rounded Rectangle, draw another rectangle just a bit smaller, and place it right in the middle of the other rectangle.
Open the Blending Options Panel again and apply a gradient using the following settings:
Blending Mode: Normal;
Opacity:100%;

Right now your canvas should look like this :

Moving on.. duplicate the last created layer by right-clicking on the layer's thumbnail and choosing "Duplicate layer".
Change the gradient style for the new created layer just as described below.

Add an "Outer Glow" filter using Screen as Blending Mode, #529fd4 as color , and 29px size.
Cut a small part of the rounded rectangle and you should have something like this:

Name it "Loaded part bar" because we will need to refer to this layer later.
Hehe..kinda looks like a pill isn't it?:)
Let's move on.
In a different layer, we need to create the stripes. There are several ways of doing them. Pick any color you want. Is not important right now.
With the Rectangle Tool create 1 rectangle as shown. Make it higher than the rest of the loading bar:

Now, with your layer still selected, press CTRL+T on your keyboard to free transform your object. A menu will come up in the upper side of your Photoshop window. Set the angle to 45.
Have a look below if you don't understand. Don't mind the text. My Photoshop is not in English.

This will rotate your object to 45 degrees.
Now duplicate the layer ten times.

For the next step, select all these 10 layers. If you don't know how, here's a tip you can use even for Windows files. Select first layer, hold down Shift key, and select the last layer of these 10. Press CTRL+E to merge these layers or right-click choose Merge Layers.
Now you have one single layer containing the stripes.
We need to get rid of the extra parts of the stripes. We only need the ones within the borders of our loading bar. We do this by selecting the "Loaded part bar" layer and then inverting the selection. In order to bring up the "Loaded part bar" layer's selection, hold the CTRL key down, and press on the layer's thumbnail. You will notice when you're doing it right because also the cursor changes. I cannot show a printscreen because it doesnt work while CTRL is on. Once your layer's border is visible(selection), press CTRL + I to invert the selection. Go back and select the stripes' layer. It might be a bit confusing but just click on the stripes' layer without holding anything else. We need the "Loaded part bar" layer 's inverted selection to remain on.
So just click on the stripes' layer and hit Delete on your keyboard. All the useless parts should go away:

Open the Blending Mode Panel to apply a few styles.
Gradient using the colors below:

and also add an "Outer Glow" using the following settings:
Screen - > Color: #0088b4 -> Size :5px;
Create another layer. Make a small vertical line right where the stripes end, blur the layer a bit with the Blur Tool(R) and then add an Outer Glow with default settings.

Add a message like "Loading...." , and you are done. Here is the final result:

No comments:
Post a Comment