Create a new 800px X 600px Photoshop document.
Use #FFFFFF as background.
We are going to add a grid to this background. In order to do that you need to follow a few simple steps.
Create a new 25px X 25px document.
Select foreground color to #b7e4f3.
Select the Line Tool, set the width to 1px and draw one vertical line that crosses the middle of the document and a horizontal one going through middle.
Select Edit->Define Pattern, give a name to your new created pattern and hit Ok.
You can close this document without saving it.
Go back to your main document.
Double click + Ok on the background’s layer icon to rasterize it.
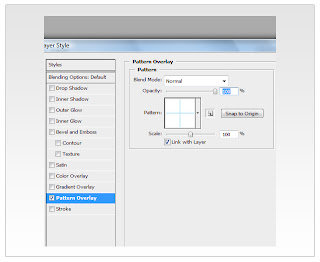
Right click on the same icon and select “Blending Options”.
Select “Pattern Overlay” and choose your new created pattern:
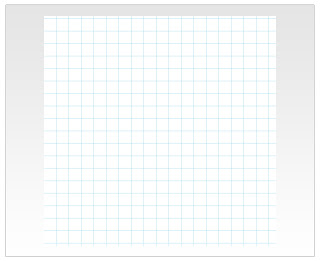
Your canvas should now look like this:
There you go..You’ve got a nice grid there, huh?!
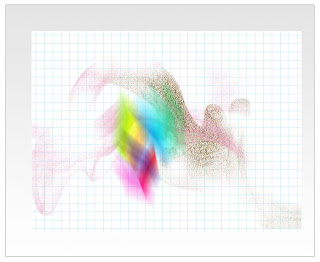
Search on Google a nice smoke brush for Photoshop. I am using these :
Create a new layer.
Regardless of the color, click once somewhere in the middle of your canvas.
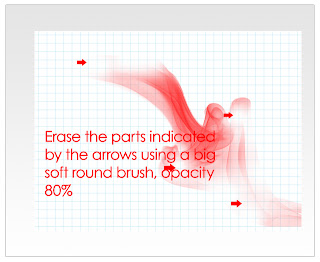
Select a soft rounded brush , set opacity to 80% and erase the parts shown in the following printscreen:
Apply noise on this layer. Select Filters -> Noise->Add Noise.
Use the following settings:
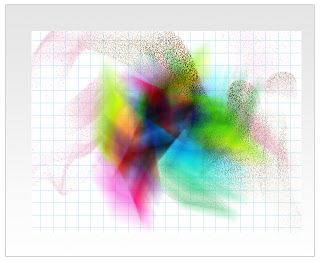
Create a different layer, choose a different smoke brush, and follow the same steps as above.
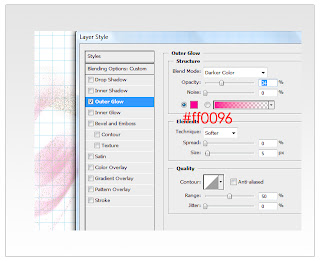
Only this time also apply an Outer Glow effect:
For the next we are going to need a colorful nice shape which you can download here.
So open the .psd, copy the layer and paste it into yours as shown:
Duplicate the layer twice. Place each as shown below. For the second copy change the mode to “Linear Burn”.
The layers are slightly rotated (Free Transform Tool(M -> Ctrl+T)) and moved to right (Move Tool (V))
Great..Let’s add the text.
The text style I used : Century Gothic -> Bold -> 160px ->Strong-> Color: #FFFFFF.
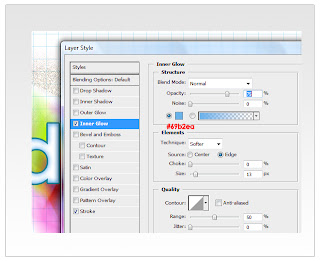
So write down the text and add the following Blending Options:
Select the Move Tool(V).
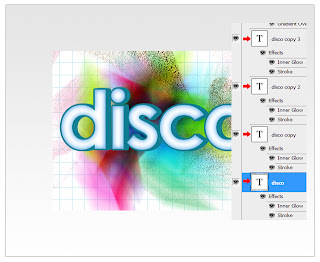
Duplicate the layer once and hit the right arrow on your keyboard once, and the up arrow once.
Repeat this step three times more:
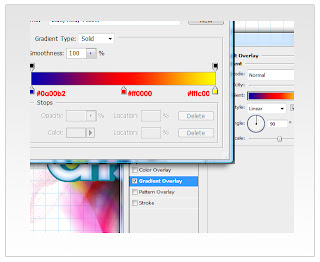
Create a new layer. Name it “Text Gradient”. Hold down CTRL key while left-clicking on the layer’s thumbnail. This will bring up the text layer selection so you can only draw in that portion. The layer’s thumbnail it is indicated by the red arrow in the picture below.
So after this step, grab a 30px soft rounded brush, set the opacity to 45% and press a few times around the layer. We don’t need it to cover the text layer fully. Slightly move it to right. Don’t worry about the color. You need to apply a gradient using the following settings:
This next step it’s optional. I just wanted to show you how to add easily glow to your text effect.
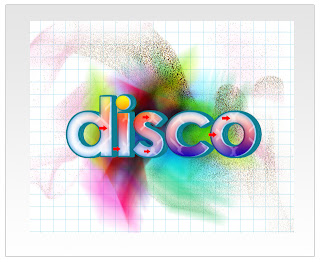
Only in a few spots pointed by the arrow, you can see it.
In order to achieve this, all you have to do is setting your brush to a hard rounded 1 px one, grab the Pen tool, and draw the path. For d & i it is a simple straight line. For C is a bit trickier and you could use here the basic Pen Tool knowledge. Next step is to right click, pick Stroke Path, check “Simulate Pressure” and hit Ok.
Feel free to add that glow to all letters.
For the next step you will need this brushes:
Actually just one but do download the whole pack there are really useful.
Good. Create a new layer and select the brush named “Sampled Brush 1”.
Now we need to do that part with the text selection again..Ctrl+Click on its thumbnail and, with the foreground color set to #FFFFFF press once inside of the selection.
Set the layer’s Blending Mode to “Soft Light”.
A way around this it is to press the brush and afterwards CTRL +Click on the text layer, Ctrl+Shift+I to invert selection and hit Delete. It’s up to you which version you prefer..
For the next step we’re gonna need another layer so go ahead and create it.
Select the brush tool and the first brush of the new downloaded pack named swirly.JPG.
Press once on top of the text as shown below. Use white as foreground color.
Select the layer’s mode to “Darker Color”. Open the Blending Options Panel and add an Outer Glow with default settings.
Add some colorful squares and blend them in by erasing some parts of them.
Final result:
Hope this was useful. For any questions about “how to?” or anything else please leave a comment.











No comments:
Post a Comment